Hexagon Shelves DIY Is the Hottest Home Decor Trend of 2023

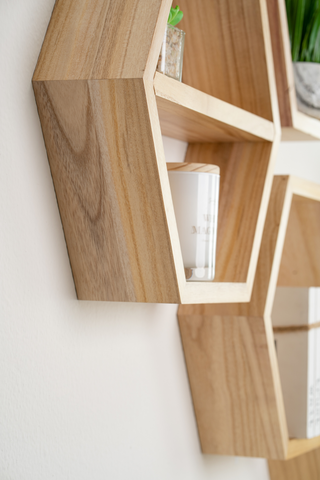
Photo by our customer
Are you looking for a simple and stylish way to add some pizzazz to your home decor? Hexagon shelves DIY is the latest trend in home decor. It’s easy, cost-effective, and the results are stunning! Get ready for a hexagon shelf makeover that will have your friends and family saying “wow!”
Why Hexagon Shelves?
Honeycomb shelves are popular because of their unique shape. They may be geometric in design, but they look anything but cold or industrial. The hexagonal shape adds an interesting visual twist wherever you place them. Plus, the hexagonal shelves can fit into almost any corner of your home, making them a great option if you’re tight on space.
DIY Hexagon Shelf vs Store-Bought
If you have basic carpentry skills and access to power tools, building your own hexagon shelves can be a fun project that saves you money as well. All you need are some wood boards (pine is an affordable option) and hardware such as screws, nails, and sandpaper to create these beautiful pieces of furniture. If you don’t feel comfortable building the shelves yourself, or simply don’t have the time or tools to do so, there are plenty of off-the-shelf options that come pre-built in various sizes and finishes.
Check out this UNIQUE HEXAGON SHELVES by LABEND HOME!


What wood to use for hexagon shelves?
You can really use any sort of wood. Pine is very popular and affordable option. We also love using walnut for more luxurious look. For a sturdy frame, strong woods like oak, maple and cedar are great options when it comes to woods that can handle the weight of books and decorations you plan on displaying. If you want something a bit more exotic, teak or mahogany will bring lush beauty your space thanks to their unique tones. No matter which type of wood you ultimately choose for your hexagon shelves, make sure that the size meets the dimensions of what you plan to store on them. With careful consideration and well-crafted construction, your shelves should be a stylish addition for years to come!
So, How Do I Make a Hexagon Shelf?
Step 1: Gather Materials
The first step is to gather materials. You will need:
- Miter Saw
- Electric sander
- Wood Board
- Wood glue (this one is one of the best ones)
- Sandpaper
- Stain or paint if you decide to use one
- Screws
- Drill
Step 2: Cut All Your Boards
Cut 6 pieces of wood for each hexagon shelf. The boards should be cut to the same length and width as the desired shelf size. We chose 6" long.
What angle do I cut for hexagon shelves?

Step 3: Sand Your Boards
Sand both sides of each piece of wood until it is smooth and free of splinters.
Step 4: Assemble Your Hexagon Shelves
Using the glue, assemble your hexagon shelf. Allow to dry completely before attempting to move or hang the shelves up
If you want to add extra support, you can pop some brad nails where boards meet.
Step 5: Stain or Paint Your Hexagon Shelves
Sand off any drips of the glue. Stain or paint your hexagons and let them dry.
If you choose to, you can stain the hexagons before glueing them together.
Step 6: Attach Hanging Mechanism
To hang your shelf on the wall, find two sturdy points on each side of the backside of the shelf where you will be attaching hanging wires or hooks or whatever mechanism you choose to use. Place two screws at each point (using four screws total) about an inch apart from each other and tighten them in place with your drill. Attach whichever hanging mechanism you chose directly onto these screws - voila! You now have a beautiful set of custom-made hexagon shelves ready for display in your home.

Step 7: Hang your Hexagon Shelves
And now the most fun part of the project - hang your shelves! Have fun and enjoy yourself!
Hexagon shelves DIY offers an affordable way to spruce up any room with its captivating shape and stylish design. With so many options available – from custom built pieces to off-the-shelf options – there’s sure to be something that fits your budget and style perfectly! So why not give this hottest home decor trend of 2023 a try? You won't regret it!
TOO MUCH OF A HASSLE? Simply shop our already made HEXAGON SHELVES HERE!

1 comment
Thank for step by step guide! I already bought some shelves from your website, and planning to diy one shelf myself just for fun!